Workshop: Advanced Calligraphy Techniques
Introduction
Every calligrapher reaches a point where the fundamentals feel comfortable. The basic strokes are second nature, letterforms are consistent, and words flow smoothly across the page. This is a wonderful place to be—it means you have built a solid foundation. But it is also the beginning of a new journey.
Advanced calligraphy is not about making letters more complicated. It is about developing control, intention, and artistry. It is about understanding why a composition works, not just how to execute it. It is about flourishing that enhances rather than overwhelms, spacing that breathes, and ink that sings.
In this guide, I share the advanced techniques I teach in my workshops here in Puebla. These are the skills that transform competent calligraphers into confident artists.
Mastering Flourishing
The Philosophy of Flourishes
A flourish is not mere decoration. At its best, a flourish is an extension of the letter’s energy—a visual echo of the stroke that created it. The finest flourishing feels inevitable, as if the letter could not have ended any other way.
“A flourish should feel like the natural conclusion of a musical phrase, not an encore that goes on too long. It resolves the energy of the letter while adding beauty.”
Principles of Effective Flourishing
Less Is More
The most common mistake among developing calligraphers is over-flourishing. When every letter is surrounded by loops and swirls, the result is visual noise rather than beauty.
Guidelines for restrained flourishing:
- Flourish the first and last letters of a word, not every letter
- Use flourishes to frame a composition, not fill it
- Let the letterforms speak for themselves
- Consider negative space as actively as you consider ink
Follow the Natural Flow
Flourishes should follow the natural direction and momentum of the stroke that produces them:
- Ascending flourishes flow upward from upstrokes
- Descending flourishes flow downward from downstrokes
- Horizontal flourishes extend the rhythm of crossbars and connectors
Forcing a flourish against the natural flow of the letter creates tension that the eye detects even if the mind cannot name it.
Flourishing Exercises
Exercise 1: The Figure Eight
The figure eight is the foundation of most flourishing. Practice drawing continuous figure eights with consistent pressure and rhythm:
- Start with large figure eights, filling half a page
- Gradually reduce the size while maintaining consistency
- Vary the angle and orientation
- Practice with both your dominant and non-dominant hand
Exercise 2: Flourish Combinations
Combine basic flourish elements into sequences:
- Ascending loop → descending loop → horizontal sweep
- Descending loop → ascending loop → return stroke
- Horizontal sweep → ascending loop → descending spiral
Practice these combinations until they flow without conscious thought.
Exercise 3: Flourishing Within Constraints
Set yourself strict limitations to develop discipline:
- Flourish a word using only ascending flourishes
- Flourish a word using only descending flourishes
- Flourish a word using a single continuous line
- Flourish a word without any loops—only sweeps and curves
Advanced Composition
The Architecture of a Page
Composition in calligraphy is the arrangement of visual elements on a page to create harmony, hierarchy, and impact. A well-composed piece guides the viewer’s eye naturally through the content while creating an aesthetically pleasing whole.
Key Compositional Principles
Hierarchy
Not all text on a page is equally important. Hierarchy tells the viewer what to read first, second, and third.
Creating hierarchy through:
- Size — Larger text draws the eye first
- Weight — Heavier strokes command more attention
- Color — Contrasting colors create focal points
- Position — Elements at the top or center are noticed first
- Space — Isolated elements stand out
Balance
Balance is the distribution of visual weight across a composition. There are two types:
- Symmetrical balance — Elements mirror each other across a central axis; feels formal and stable
- Asymmetrical balance — Different elements achieve equilibrium through varied visual weight; feels dynamic and modern
Rhythm
Rhythm in calligraphy comes from the repetition and variation of visual elements. The alternation of thick and thin strokes, the spacing between letters and words, the pattern of flourishes—all create rhythm.
Creating rhythm:
- Establish a pattern and then vary it subtly
- Use repetition to create visual music
- Break rhythm intentionally for emphasis
- Consider the rhythm of negative space as well as ink
Compositional Formats
The Classical Layout
The classical layout centers all text on the page with generous margins. This format is timeless and appropriate for formal occasions.
Structure:
- Top margin: 15-20% of page height
- Bottom margin: 20-25% of page height
- Side margins: 10-15% of page width
- Text centered both horizontally and vertically within the text block
The Asymmetrical Layout
Asymmetrical layouts place the text block off-center, creating dynamic tension. This format feels modern and artistic.
Approaches:
- Text aligned to one side with flourishing balancing the opposite side
- Diagonal text flow across the page
- Text clustered in one quadrant with generous negative space elsewhere
The Framed Layout
A framed layout uses decorative borders, flourishes, or illustrated elements to create a frame around the text. This format is particularly effective for certificates, awards, and formal invitations.
Advanced Ink Techniques
Ink Consistency and Control
The consistency of your ink dramatically affects the quality of your work. Too thin, and your hairlines disappear. Too thick, and your pen will not flow.
Testing ink consistency:
- Dip your pen and draw a hairline upstroke
- The line should be continuous and even
- If it skips or feathers, adjust the consistency
- Add water to thin; allow evaporation to thicken
Ink Mixing for Custom Colors
Creating custom ink colors expands your expressive range enormously:
- Sumi ink + watercolor — Creates translucent, layered effects
- Iron gall ink + acrylic — Adds body and opacity
- Walnut ink + gum arabic — Produces warm, vintage tones
- Pigment powders + gum arabic solution — Unlimited custom colors
The Art of the Wash
Ink washes—diluted ink applied with a brush—add depth and atmosphere to calligraphic compositions.
Wash techniques:
- Gradient wash — Dark to light transition across the page
- Spot wash — Concentrated areas of tone behind or around text
- Layered wash — Multiple washes in different colors for complexity
- Dry brush wash — Almost-dry brush creating textured, scratchy effects
Advanced Letterform Design
Understanding Letter Anatomy
Deep knowledge of letter anatomy enables you to modify and create letterforms with intention:
- X-height — The height of lowercase letters without ascenders or descenders
- Ascender height — How far letters like b, d, h extend above the x-height
- Descender depth — How far letters like g, j, p extend below the baseline
- Counter — The enclosed or partially enclosed space within a letter
- Bowl — The curved portion of letters like b, d, o, p
- Terminal — The end of a stroke that does not include a serif
Modifying Letterforms
Once you understand letter anatomy, you can intentionally modify letterforms for specific effects:
- Elongated ascenders and descenders — Create elegance and verticality
- Compressed x-height — Produce a compact, energetic feel
- Exaggerated contrast — Increase the difference between thick and thin for drama
- Reduced contrast — Create a more uniform, modern appearance
- Alternative letterforms — Use historical or creative variants for specific letters
Creating Custom Alphabets
Advanced calligraphers often design custom alphabets for specific projects:
- Define the purpose — What mood or message should the alphabet convey?
- Establish proportions — Decide on x-height, slant, and contrast
- Design key letters — Start with letters that define the style (often a, e, o, n, h)
- Complete the alphabet — Extend the design to all letters
- Test and refine — Write words and sentences to identify inconsistencies
- Document — Create a reference sheet for consistent application
Working at Different Scales
Large-Scale Calligraphy
Working large—on posters, murals, or broadsheets—requires different techniques than small-scale work:
- Different tools — Large brushes, mop pens, or even paint rollers
- Body mechanics — Use your arm and shoulder, not just your wrist
- Viewing distance — Design for how the piece will be viewed, not how it looks up close
- Surface preparation — Large surfaces may need priming or sizing
Micro Calligraphy
At the opposite extreme, micro calligraphy demands extraordinary precision:
- Magnification — Use a loupe or magnifying lamp
- Fine nibs — Extra-fine pointed pen nibs or technical pens
- Steady hands — Brace your writing hand against a stable surface
- Controlled breathing — Execute strokes between breaths for maximum stability
Presentation and Finishing
Mounting and Matting
How you present your calligraphy is part of the artwork:
- Acid-free materials — Always use archival, acid-free mats and backing
- Appropriate margins — Generous mats give the work room to breathe
- Color coordination — Mat color should complement, not compete with, the work
- Professional framing — Invest in quality framing for pieces you intend to keep or sell
Photography and Documentation
In the digital age, documenting your work well is essential:
- Natural light — Photograph near a large window on an overcast day
- Tripod — Keep the camera perfectly still and parallel to the work
- Multiple exposures — Bracket your exposures to capture full detail
- Post-processing — Adjust white balance, contrast, and sharpness carefully
- Detail shots — Capture close-ups of particularly fine work
Teaching and Sharing
The Value of Community
Advanced calligraphy is not a solitary pursuit. The calligraphy community—locally in Puebla and globally online—provides inspiration, feedback, and support.
Ways to engage:
- Attend workshops and conferences
- Join online calligraphy communities
- Participate in calligraphy challenges and projects
- Share your work and process openly
- Seek constructive criticism and act on it
Teaching Others
Teaching is one of the best ways to deepen your own understanding. When you explain a technique to someone else, you clarify it for yourself.
Starting to teach:
- Begin with friends or family members
- Offer informal practice sessions
- Develop structured lesson plans
- Consider hosting workshops in your community
- Create online tutorials to reach a wider audience
“Every time I teach a workshop in Puebla, I learn something new from my students. Their questions reveal assumptions I had not examined. Their struggles remind me of my own. Teaching is not giving what you know—it is discovering what you know alongside someone else.”
Continuing Your Journey
Resources for Advanced Study
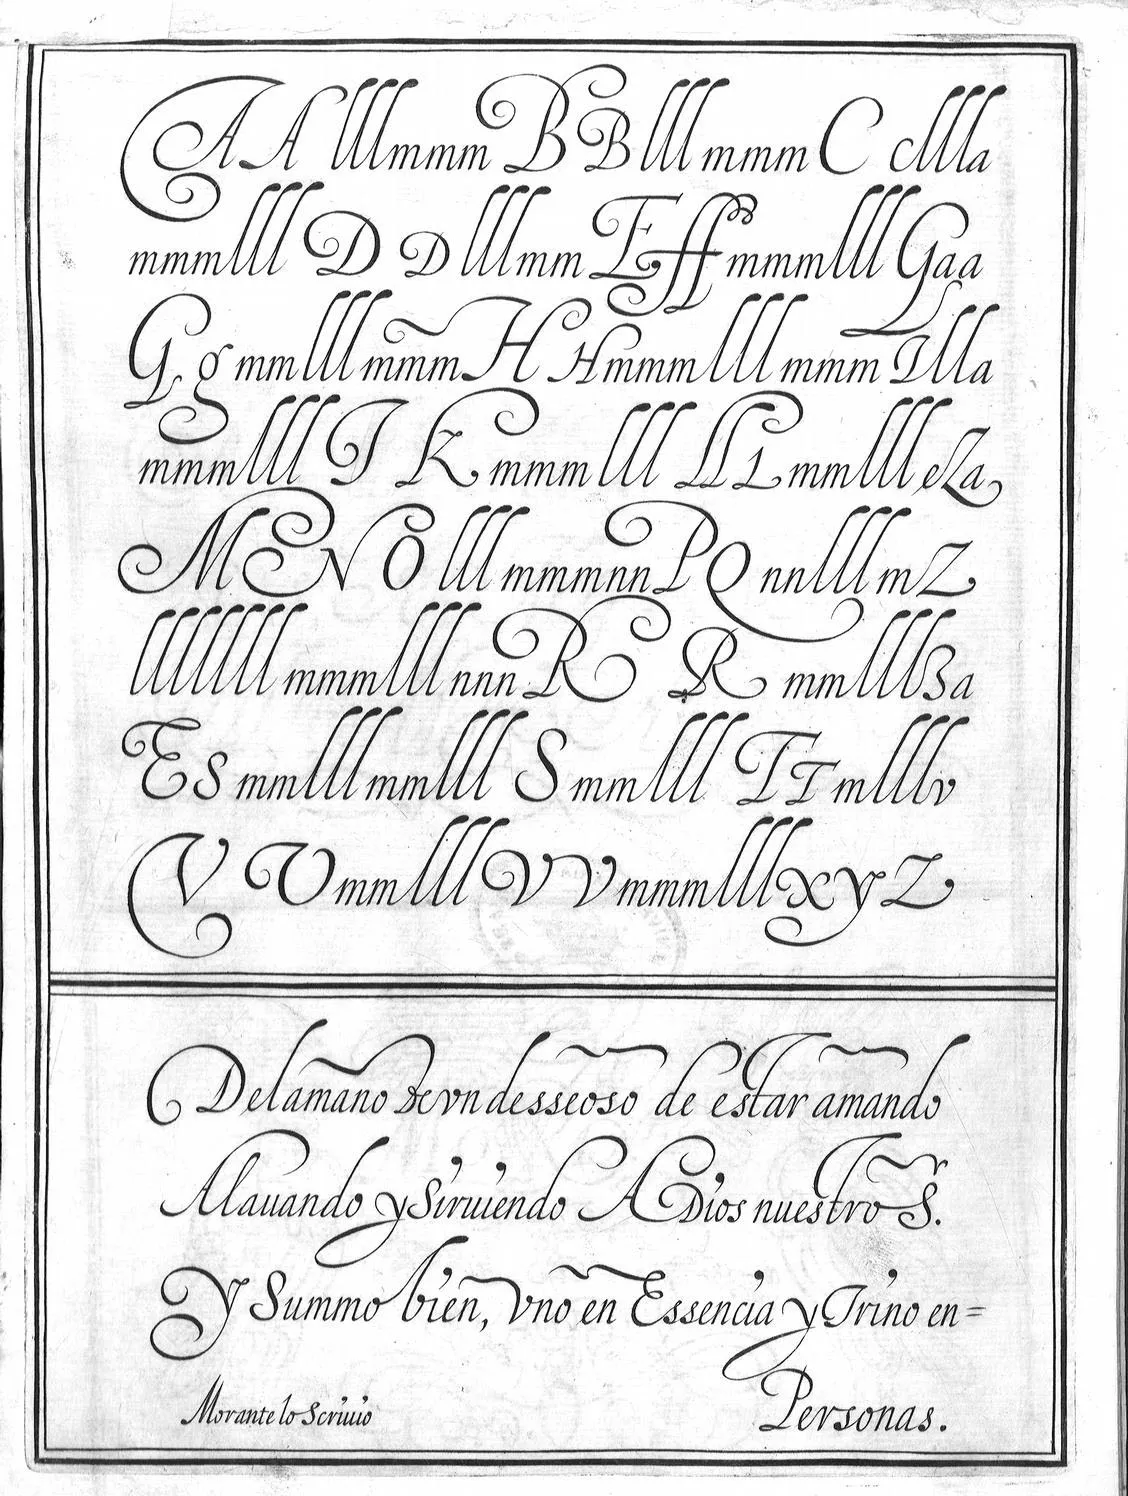
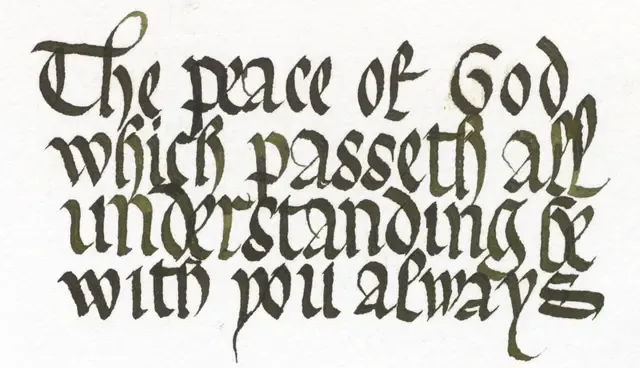
- Historical manuscripts — Study original works in museums and digital archives
- Contemporary masters — Follow and learn from leading calligraphers worldwide
- Cross-disciplinary study — Learn from typography, graphic design, and fine art
- Historical texts — Read treatises on lettering from different eras
- Practice, practice, practice — There is no substitute for time at the desk
Setting Goals
Advanced practice benefits from intentional goal-setting:
- Technical goals — Master a specific hand or technique
- Creative goals — Develop a personal style or complete a series
- Professional goals — Take on commissions, teach workshops, exhibit work
- Community goals — Contribute to the calligraphy community in meaningful ways

Conclusion
Advanced calligraphy is a lifelong pursuit. There is always another level of control to achieve, another compositional insight to discover, another flourish to refine. This is not a cause for frustration but a source of endless fascination.
The techniques covered in this guide—flourishing, composition, ink mastery, letterform design, scale work, and presentation—represent the core skills that separate competent calligraphers from confident artists. But techniques are only the beginning. The ultimate goal is to develop a voice that is unmistakably yours, a way of making letters that could only come from your hand and your heart.
In my workshops in Puebla, I always tell my students: the pen is an extension of your nervous system. What flows from it is not just ink on paper—it is attention, intention, and emotion made visible. Master the techniques, yes. But never forget that the techniques exist to serve something deeper: your desire to create beauty, to communicate meaning, to connect with others through the ancient, enduring art of beautiful writing.
Keep practicing. Keep exploring. Keep pushing the boundaries of what your hand can do. The journey is the destination.